How to Curl Hair with a Straightener: Easy Steps & Pro Tips
Curling hair with a straightener is a game-changer for anyone seeking versatile, salon-quality styles at home. Unlike traditional curling tools, a straightener offers unmatched versatility, allowing you to straighten, curl, or create waves effortlessly. Imagine saving time and replacing multiple tools with one device that delivers quick and easy curling methods. Whether you're rushing for work or prepping for a night out, a straightener simplifies your routine. This article'll dive into actionable tips, expert advice, and techniques to master flat iron curls like a pro.
Understanding Straighteners for Curling
Why Use a Straightener Instead of a Curler?
Straighteners are highly versatile, making them a favorite among hair enthusiasts. Unlike traditional curling irons, which are limited to creating curls, straighteners offer multiple functions:
- Straightening: Achieve sleek, shiny locks effortlessly.
- Curling: Create anything from loose curls to tight ringlets.
- Waving: Add soft, relaxed beach waves to your hair.
Another advantage is portability. Portable flat irons for travel are lightweight and compact, allowing you to style on the go. This versatility makes them one of the best tools for versatile hairstyles, suitable for everyday use or special occasions. Additionally, straighteners require fewer accessories, saving you money and space while offering time-saving hair styling hacks.

Features to Look for in a Straightener for Curls
Not all straighteners are created equal when it comes to curling. To achieve professional-quality curls, look for these key features:
- Plate Size: A 1-inch flat iron is ideal for curling and straightening. It provides the perfect balance of control and flexibility for various hair lengths.
- Rounded Edges: Straighteners with rounded edges help create smooth curls without leaving unsightly creases.
- Adjustable Heat Settings: Different hair types require different heat levels. Adjustable settings allow you to style fine, thick, or damaged hair safely.
These features transform a flat iron into the ultimate multi-purpose hair tool, giving you control over everything from tight curls to relaxed waves.
Straightener vs. Curling Iron: Which is Better for You?
Both tools have their merits, but straighteners stand out for their flexibility. While curling irons are better for achieving consistent, tight curls, straighteners offer a broader range of styles.
- Flat Iron Curls vs. Curling Wand Results: Straighteners deliver more natural, relaxed curls while curling wands create more defined shapes.
- Ease of Use: Straighteners are generally easier for beginners to master because they can also straighten sections before curling.
Ultimately, straighteners are the best option for those who prefer versatile hair tools that can adapt to different styles and occasions.
Prepping Your Hair for Curling
Importance of Prepping
Before you even think about curling, proper preparation is essential. Prepping ensures your curls last longer, look healthier, and withstand the heat from styling tools. Without this step, you risk causing unnecessary damage or achieving inconsistent results.
Step-by-Step Prep Guide
- Wash and Dry Your Hair: Start with clean hair for better hold. Use a shampoo and conditioner that adds volume and texture.
- Apply Heat Protectant: Generously spray a heat protectant to shield your hair from damage. Products like TRESemme Heat Tamer or pricier alternatives are highly effective.
- Add Mousse or Styling Cream: A volumizing mousse for curls can add body and help your curls hold their shape.
- Section Your Hair: Divide your hair into manageable sections using clips. This ensures even curling and allows you to focus on smaller strands for more precise results.
Proper prep not only protects your hair but also makes the curling process smoother and more efficient.

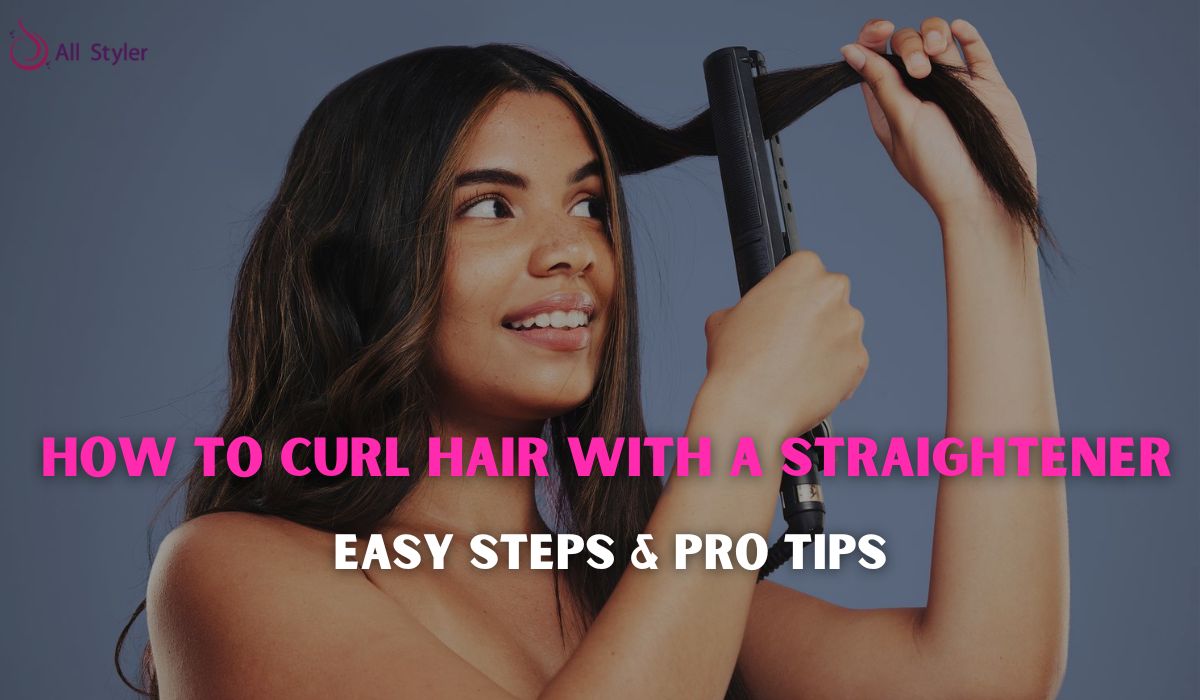
Mastering the Techniques: Curling with a Straightener
The Basics: Straightener Positioning
The way you hold your straightener significantly impacts your results. Follow these tips:
- Hold the Flat Iron Correctly: Position it at an angle to your hair strand, either vertically or horizontally, depending on your desired curl.
- Clamp with Light Pressure: Too much clamping can damage hair, while too little won’t create curls.
- Smooth, Continuous Motion: Glide the straightener smoothly down the hair shaft to avoid kinks or uneven curls.
Step-by-Step Tutorials for Curl Styles
Beach Waves Tutorial
- Clamp the straightener near the roots of a section.
- Rotate the tool outward, creating a “C” shape as you glide down.
- Use a beach waves tutorial flat iron method for casual, relaxed curls.
Polished Waves
- Hold the straightener horizontally and curl away from your face.
- Use slow, controlled movements to create sleek, uniform waves.
- Perfect for formal occasions, easy polished waves for beginners are a must-try.
Bouncy Curls
- Twist the flat iron 360 degrees while gliding down.
- For extra volume, repeat the process with smaller sections.
- Follow the bouncy curls with flat iron guide for defined, voluminous curls.
Hollywood Glam Curls
- Alternate the direction of your curls for a natural, glamorous look.
- The Hollywood glam curls how-to technique involves creating tight “S” shapes that ooze sophistication.
Tips for Better Curling Results
- Experiment with Alternating Directions: Curl sections in different directions for a more natural look.
- Leave Ends Straight: For a relaxed beach wave, keep the ends uncurled to mimic natural movement.
- Finish with a Styling Product: Use a lightweight texture spray or hairspray to lock in curls without stiffness. L’Oreal Elnett Satin is a great option.
- Touch-Up When Needed: If a curl looks off, re-curl that section using proper techniques.
Expert Tips for the Perfect Curls
Creating flawless curls with a straightener can be a game-changer for your hair routine. Professional hairstylist curling hacks include practicing with the straightener turned off to master the wrist motion without heat damage. For softer, face-framing curls, start by curling the sections around your face away from it. To enhance the hold and longevity of your curls, use clips to secure each curl until it cools.

This cooling tip for long-lasting curls ensures a defined and polished look. For thicker hair, divide it into smaller sections to achieve consistent results, making it one of the best curling hacks for thick hair.
Troubleshooting Common Mistakes
Even seasoned stylists encounter challenges while curling hair. If your curls turn out flat or droopy, try adjusting the tension or using a texture spray for curls before styling. Avoid overheating your hair to prevent frizz; a low-heat straightening tip can save your strands from damage.
Short hair may require smaller sections and a quicker rotation of the straightener to get well-defined curls. Lastly, to correct over-clamping or awkward angles, gently re-curl the piece in the opposite direction for a relaxed finish.
Styling Tips for Long-Lasting Curls
The secret to long-lasting curls lies in the products and techniques you use. Apply the best heat protectant spray for flat irons before styling to shield your hair. Use a combination of top hairsprays for curly hairstyles and texture sprays to lock in the curls and add dimension. For a natural look, mix curl sizes, as this curling tip for short hair creates texture and movement. Layering curls can also give your hair extra volume, making this a must-try hack for finer hair.
Maintaining Curls for the Next Day
Protecting Your Style Overnight
To keep your curls intact overnight, switch to silk pillowcases for curls, which reduce friction and frizz. Wrapping your hair in a silk scarf or using a loose bun can help maintain the style. If needed, refresh your curls with a light texture spray for second-day curls in the morning.
Styling Second-Day Hair
For second-day styling, use a flat iron for quick touch-ups, focusing on areas that have lost shape. Hairstyles like half-up buns, ponytails, or braids can creatively incorporate remaining curls while looking fresh and trendy. These easy second-day hairstyles are perfect for extending the life of your curls.

Heat Protection and Hair Health
The Importance of Heat Protectants
Using a heat protectant spray is vital to prevent damage and maintain hair health. Affordable options like TRESemme Heat Tamer are excellent for color-treated hair, while pricier sprays provide extra nourishment for frequent heat users. Investing in the best heat protectant sprays for flat irons can make a noticeable difference.
Reducing Heat Damage
Reduce heat damage by keeping the straightener moving steadily and avoiding excessively high temperatures. This flat iron technique to avoid damage is crucial for maintaining healthy strands, even with regular heat styling.
Post-Heat Hair Care
After curling, focus on hydration. Incorporate deep conditioning treatments weekly and use serums or oils to restore shine. These hair health tips after heat styling ensure your hair remains soft, smooth, and manageable despite the frequent use of hot tools.
Product Recommendations
Best Flat Irons for Curling
Choosing the right flat iron can make all the difference when curling your hair. Some top-rated flat irons for curls include professional straighteners for curling that provide even heat distribution and smooth results.
If you're on a budget, affordable flat irons for styling, like those from trusted brands, deliver excellent performance without breaking the bank. High-end options often feature advanced temperature control and ceramic plates, perfect for achieving relaxed, beachy waves or defined curls.
Must-Have Styling Products
Styling products are essential for protecting your hair and enhancing your curls. Start with a heat protectant spray, like TRESemmé Heat Tamer, to shield your strands from damage. Add texture with products such as Not Your Mother’s Double Take Texture Spray, which grips and volumizes your hair for a polished look.
For extra shine, opt for texturizing sprays for volume or shine sprays for polished curls. Whether you choose affordable or luxury options, these products ensure your curls hold and look flawless.
Accessories for Easier Curling
Accessories simplify the curling process. Sectioning clips make dividing your hair manageable, while the best brushes for detangling before curling help prepare your strands. Use hair combs for defined curls to shape and refine your style. These tools, combined with the right techniques, make curling with a straightener a breeze.
Quick Hacks for Busy Days
Five-Second Touch-Up Techniques
When you're short on time, focus on the top layers of your hair. A quick run with the flat iron can add just enough curl to freshen up your look. Fast curling methods with a straightener are perfect for busy mornings.
Creating Faux Curls with Minimal Effort
For faux curls, wrap sections of hair around your fingers and heat lightly with the flat iron. This quick faux curls tutorial creates volume and texture without taking much time.
Mixing Natural and Styled Curls for a Quick Fix
Combine natural and styled curls for an effortless, relaxed look. This easy mix-and-match curl style works great if you already have some natural wave or texture in your hair.
Multimedia and Interactive Features
Step-by-Step Photo Guides
Visual learners will benefit from step-by-step photos for flat iron curls. Photos can illustrate how to wrap the hair around the iron and the direction of rotation for various curl styles.
Video Tutorials
Beginner video tutorials for curling help you perfect the technique. These tutorials are especially useful for those trying to master unique curl styles for straighteners.
Encouraging Experimentation
Try Different Curl Styles
Step out of your comfort zone and try relaxed, natural, loose curls or tighter, defined ringlets. Unique curl styles for straighteners let you create a variety of looks, from everyday casual to glamorous evening styles.
Share Success Stories
Social media-inspired hair trends offer great inspiration. Encourage readers to share their curls on social media and tag your blog. Sharing reader success stories can motivate others to experiment and enjoy the process.
Final Thoughts
Curling your hair with a straightener is a versatile and straightforward technique. From relaxed beach waves to polished curls, a flat iron can achieve it all. Remember, the benefits of versatile hair tools go beyond styling they simplify your routine and inspire creativity.
Frequently Ask Questions For "How to Curl Hair with a Straightener"
Can you curl hair with any straightener?
Yes, you can curl hair with most straighteners, but the best results come from using a flat iron with 1-inch plates, rounded edges, and adjustable heat settings. These features allow smooth and precise curling without creases.
How do I prep my hair for curling with a straightener?
To prep your hair, start with clean, dry hair. Apply a heat protectant spray to shield your strands, and use a volumizing mousse for hold. Section your hair into manageable parts to ensure even and long-lasting curls.
What’s the best technique to create beach waves with a straightener?
To create beach waves, clamp the flat iron near the roots, twist it outward slightly, and glide down the hair shaft in a fluid motion. For a natural look, leave the ends slightly straight.
How do I maintain curls created with a straightener?
To maintain your curls, finish with a lightweight hairspray or texture spray. Sleep on a silk pillowcase or secure your hair in a loose bun to preserve the style overnight. Touch up any loose curls with the straightener in the morning.
How can I avoid damaging my hair while using a straightener?
Avoid damage by using a heat protectant and keeping the straightener on a low to medium heat setting. Glide the straightener smoothly without holding it in one spot for too long, and incorporate regular deep conditioning treatments into your routine.